Sharing my sourdough starter, I went to look at the recipes posted here to share as well and realised that my method has mutated/evolved over the months: Largely due the conversations had with my brother in-law, provider of my starter, who is a very enthusiastic and scientific sourdough baker.
So here is my adapted method (minimal level of work) for making sourdough in a cool kitchen, see the ‘asides’ if you have an Aga or Rayburn.
I take about 60g of the starter I keep in the fridge, add it to 150ml luke warm water (ml=g for water anyway, so I sit the bowl on the scales to “measure” the water) stir and add 150g strong white flour. Cover with a tea towel or cling film, leave at room temp at least overnight, I often leave it over 24 hours and sometimes next to the cooling wood burner overnight, it should look a bit frothy on the top.
You will need to feed the starter before you put it back in the fridge for next time – the next day or several weeks – if leaving for weeks it’s a good idea to feed a teaspoon or two of flour in between uses, if any grey liquid forms on top tip it away. How ‘wet’ you keep this mixture is up to you, but it does need to be wet enough to behave like a liquid and form a level surface. Give it about the weight you removed of flour and water, mix, you can put it straight back in the fridge or leave it at room temperature for a little while to give it a chance to wake up a bit, if you’re going to use it the next day again, leave it out, if you are baking weekly, straight back in the fridge
To the starter I left out overnight, I add another 200ml luke warm water, 5g/ 1 tsp salt and 400g of flour…
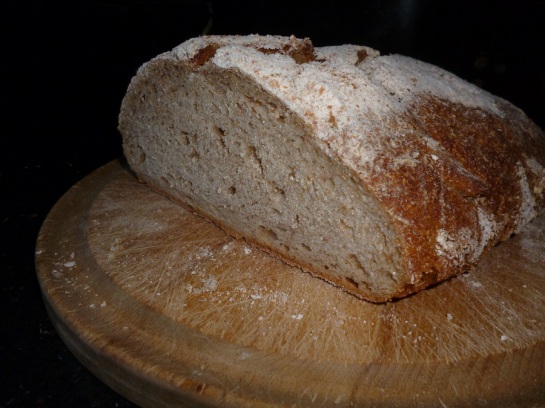
Usually I use about 200g strong white, and 100g each of rye and wholemeal, all white will give you a lighter feel, the rye helps with the classic firm/rubbery feel of a sourdough.
Mix it a bit with a spoon just to get all the flour ‘wet’. Now here’s where my method alters every time! I reckon you need to mix it about 4 times in the first couple of hours, but that can stretch to 4 or shrink back to 1 hour if you’re in a bit of a rush… Every now and then bring the edges into the middle of the bowl, you don’t need to knead it as such, the dough will start to feel smooth and will feel more elastic. I prove in a 2lb loaf tin lined with silicone baking paper and sprinkled with flour, this doesn’t stick too badly most of the time. For the final shaping I tend to make a sort of swiss roll as I’m shaping it, (I think this helps with big bubbles throughout, but I’m not sure!)
Proving, now is where the timing is important, you need enough time for it to double in size (or thereabouts) in the proving. In a cold kitchen that can take 6 hours, though any heat will decrease the time, an airing cupboard (or an oven below 40 degrees). I have been known to put the bread in the oven at 11pm because it took so long! But if you leave it overnight it may over prove, when this happens it can ‘collapse’ in the oven, so if you find you dough escaping the proving ‘basket’ then scrape it all back into a bowl ‘knock it back’ (knead it a bit) and start the prove over again, it shouldn’t take long as the yeasts are all active. (If this happens a couple of times you could end up with no more food left for the yeasts to eat and then it would not rise, but it hasn’t happened to me yet!) You can bake it before it doubles in size so it doesn’t happen again.
Heat the oven to 220-240 degrees celsius, (gas 9), put in it a large Le Creuset (or similar cast iron pan) with the lid on. Mine is oval hence using the loaf tin to prove, if yours is round use something round to prove in- maybe a small mixing bowl lined. You are going to use this as a ‘Dutch Oven’, to keep the steam in and create a better crust to the bread. Tip the dough into the pan, tricky to get in the middle of the pan and not to burn your fingers, you can’t easily shift the dough once it has hit the hot surface of the pan, use a wet sharp knife to cut some deep slits into the dough. Put the lid on and bake for 25 minutes with the lid on, and then a further 10 with the lid off and oven down to 200 degrees. Tip out onto a cooling rack, listen to the crackling of the crust, and eat!
Even more Brother in-law’s tips:
Use fine cornmeal for the dusting of the dough in the proving basket for a more ‘authentic’ look,
Mist the dough with water before putting the lid on the Le Crueset
Wrap the bread in a tea towel as soon as it comes out of the oven,
The wetter/more sloppy your dough is, the more big bubbles you will get,
Using a ‘proper’ proving basket you get those lovely spirals on the crust,
It’s not worth trying to get steam into the oven if you have a fan oven, but if not (I’m imagining for an Aga type oven), you could use a pan of water in the bottom of the oven rather than use the Dutch Oven idea,
ENJOY, and any ideas or questions please do share with me.


